
HELP
Answers to the questions marketplace admins ask most, from getting started to billing and data export.
Short answers to the questions marketplace admins actually ask. Prefer step-by-step instructions? See the admin guide, or check what's new in the changelog.
Sign in at your board's personalised web address (it ends in .app.gospacewalk.com). You'll land on your board's home page - exactly what your members see. From there, press "Manage Marketplace" to reach your controls: "Overview", "Customisation", your member tabs and "Analytics".
The menu icon (top right) opens the sidebar: "Tips and reminders", "Manage" (your company, "Marketplaces", "Roles" and an "Add role" shortcut that opens the posting form straight away), one-click "Manage marketplaces" links into each of your boards and "Account". The bell icon opens the "Notifications" sidebar, where updates and alerts are grouped - when there's nothing to act on, it says "Nothing needs your attention."
It's your own branded job board and careers hub that connects your talent community with relevant opportunities. Once your board is set up, Spacewalk notifies you of join requests, lets companies post roles, notifies candidates of suitable new roles, notifies employers of new applications and lets employers review and contact applicants.
After a short setup - branding, access, inviting your community and telling us your job stream criteria - very little. Most admins spend a few minutes here and there:
You don't hunt for jobs to keep the board fresh, you don't reconfigure the stream yourself and you don't chase members with updates - the weekly role-match email does that for you.
Press the small info button (a circled "i") at the top right of the screen. Every tab in both "Manage Marketplace" and "Manage Company" has one, and a help panel opens that explains that screen in plain language - no need to leave the app or keep a guide open. Press it again, or click anywhere else, to close it. Every tab has its own panel, including sub-tabs. For example:
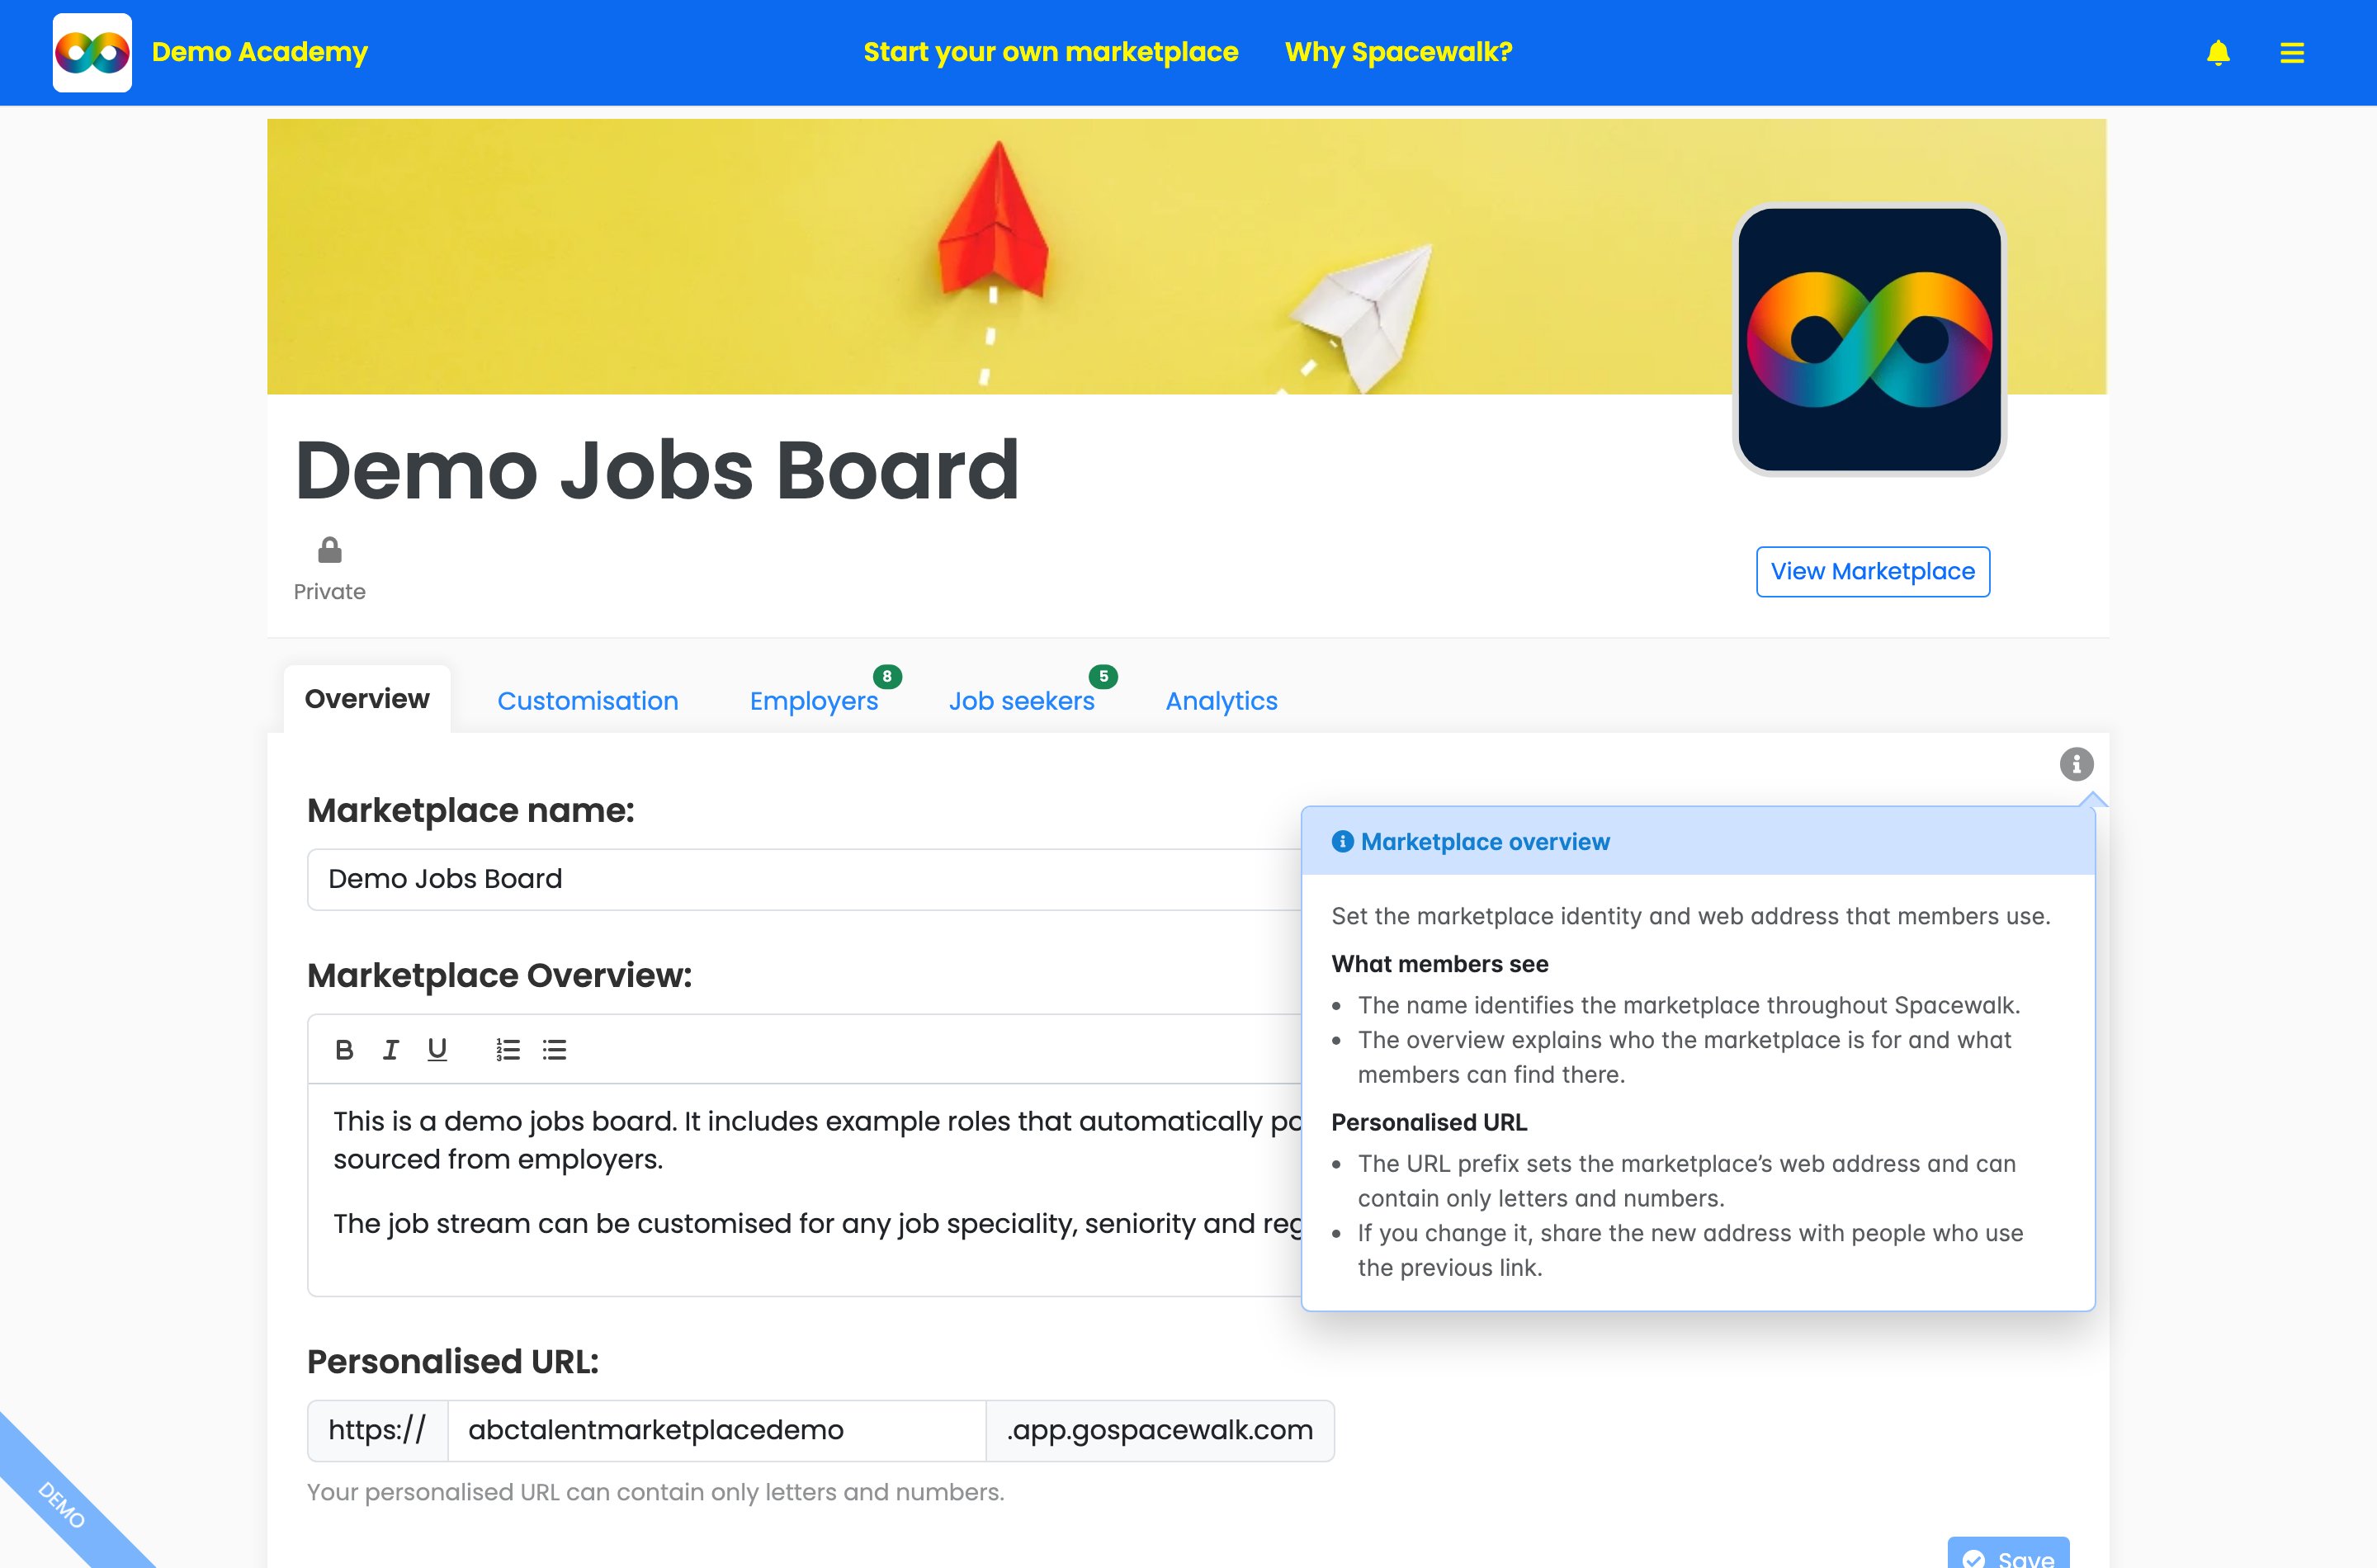
Press the info button on any tab for instant help - here the "Marketplace overview" panel explains what members see and how the personalised URL works.
The job stream keeps your board full of fresh, relevant roles automatically. You don't build it in the app - you tell us the kind of roles your members want (job specialities, skills, seniority, locations or regions) and we configure the stream for you. New matching roles then flow onto your board on their own, marked "Just Listed" when they're brand new.
Roles are sourced directly from employers, not scraped from job-board aggregators, so they're real and current - and the stream can be customised for any speciality, seniority and region, globally. To change it later, just tell us your new criteria; there's nothing to reconfigure on your side.
Members get filters to discover stream roles - "When Posted", "Categories", "State Or Region" and "Source" - and you can turn on the Weekly "Job Stream" Opportunities Email under "Customisation" then "Settings" then "Engagement" so members receive role matches by email every week.
Before you publish, set "Work rights" so applicants know who can be considered based on their current work rights. Choose "Citizen or permanent resident only", "Full working rights (no sponsorship)", "Sponsorship available" or "Student visa friendly (part-time / casual)", or leave it at "Work rights not specified". The same form also offers "Screening Questions", "CV required to apply" and "Restrict role access and sharing controls..." such as "Require marketplace membership to view role".
On the role form, use "Budget": choose a "Budget status" ("Specified amount", "Negotiable", "Unpaid" or "Not specified"). For a specified amount, pick a "Payment basis" - a "Time-based rate" (per hour, day, week, month or year) or a "Fixed fee" - enter the amount in any of 40+ currencies and tick "Show budget on the role page" if candidates should see it. Under "Expected duration", choose "Permanent", "Fixed term" (with a length) or "Not specified".
First turn it on. Open the menu, then "Manage Company", then "Settings", and under "Employer and role reach" switch on "Employer profiles" so company admins can create and manage the brands you post roles for. The same section holds "Post roles to our marketplaces only", which keeps role posting and candidate matching to the marketplaces your company owns or belongs to. Then open "Manage Company", then "Company", then "Employer profiles" - one place to add, search, edit, duplicate, remove and export the employer brands you post on behalf of. While posting a role, press "Change employer" to select one or add a new profile on the spot.
Yes. When posting a role, choose "Redirect to an external application form / ATS" under "Application method" and paste your "ATS URL". When a job seeker presses "Apply", they go straight through to your ATS. Prefer to collect applications in Spacewalk? Choose "Receive applications on Spacewalk" instead.
Manage individual roles from "Manage Company" then "Roles" (filter by "Available", "Closed", "Archived" or "All", or type into "Search roles" to find one by name). To feature a role, turn on its "Featured" control in the "Post opportunity to..." table when you post or edit it - featuring is set per board, so a role can be featured on one board and listed normally on another. Hide closed roles board-wide with "Hide Closed Roles" under "Customisation" then "Settings".
Set your company defaults under "Manage Company", then "Settings", then "Restrict role access and sharing controls", and press "Save". "Require marketplace membership to view role" stops people outside the role's marketplaces viewing or applying, even if they have the URL. "Disable copying role details" and "Disable printing" discourage people redistributing a role. "Allow per-role overrides" lets role managers adjust these controls on individual roles.
Use these controls when a role holds sensitive information or is meant for a limited audience. Leave overrides off when every role should follow the same company policy, and turn them on when some opportunities need their own confidentiality settings. The controls discourage redistribution, they cannot prevent screenshots or retyping.
Open the role and press "View Applicants". The stage counters across the top - "Applicants", "Shortlisted", "Interview", "Offered", "Placed" and "Not proceeding" - filter the list as you press them.
Press an applicant's name to open their row. "Applicant details" covers who they are and the files attached to the application, "Profile summary" gives a quick read of their profile so you can judge fit without opening everything, "Skill Matches" shows how their skills line up with the role and "Internal comments" holds the notes your team leaves for each other. Vote up and vote down record an internal review, which stays with the company that owns the role.
Set "Stage / Status" on a row to move someone through your process, or press "Change multiple statuses?" to update several people at once. "Open all rows", "Close all rows" and "Export (All rows)" sit on the same screen.
Go to "Manage Marketplace", then "Customisation", then "Settings". Under "Marketplace access" choose "Public" (anyone can join), "Private" (join by invitation or approved request) or "Invitation only" (members must be invited), then press "Save". You can also show a company join option for employers and allow company members to invite job seekers.
Go to your members tab in "Manage Marketplace", then "Invites", then "Invite new members". Add people one at a time with "Add to list" or press "Paste a list" and drop in up to 500 people at once - one or several per line, names optional, in any mix of formats. Press "Add valid people to list" and duplicates are merged automatically, while anything unrecognised stays in the box with a clear message so you can fix it. Under "Review invitations", check the "Ready to send" list and open "Skipped" to see anyone left out and why (for example "Already invited or joined"), then press the send button.
The "Invitation status" tab tracks everyone invited, with "Awaiting response" and "Ready to resend" filters, "Select multiple rows?" for picking several people at once and "Export (All rows)" to download the list. Resend an invite or copy an invite link from a person's row.
Go to "Manage Marketplace", then your companies tab, then "Invites". Under "Invite Company", search by name and click to invite - or invite them by email if they're not found. The "Joined" tab then shows every company on your board with its profile status, "Member Since", "Latest Role Activity", "Admins", "Roles posted" and "Roles open", so you can spot employers who joined but never posted.
Approve waiting people from the "Requests" tab (you're notified in the bell-icon "Notifications" sidebar). To remove someone, press the red remove icon in their row on the "Joined" tab and confirm.
By default, only you and your co-admins - whether your board is public or private. Members and employers see the roles and community features you switch on, not your full list of people.
Yes, if you switch on "Internal staff as job seekers" under "Manage Company", then "Settings", then "Advanced", and press "Save". It is off unless you choose it. It gives your employees access to internal mobility roles, so staff can apply for roles posted by your company and for roles in any marketplace your company owns or belongs to. It is separate from inviting external individuals to join a specific marketplace. The "Advanced" settings are specialised workflows, so enable this one only when it matches how your company operates.
Custom skills are designed for boards that connect roles to their own talent pool - like tutor companies, internal talent marketplaces or specialised on-demand agencies. Instead of the standard skills library, you maintain your own approved list (and even your own wording, such as "subject" and "subjects"). Your catalogue can guide people towards your preferred terms, or enforce a restricted list, depending on how tightly you want to control the wording your community uses.
When posting a role, the "Desired skills" search then draws on your own catalogue, so roles are matched to people with those exact skills. The Skills table shows "Role uses" and "Profile uses" so you can see which skills are doing the work, and once the catalogue grows you can use "Search custom skills" to find one quickly or press "Export" to download the list. If you run a general job board, leave this off - the standard library already covers general hiring.
Go to "Manage Marketplace", then "Analytics". Three views cover it all:
These numbers update themselves, so the answer to "is it working?" is always ready to screenshot for your stakeholders.
Set it once and forget it:
For company emails, open the menu, then "Manage Company", then "Company", then "Branding", then the "Email" tab. Under "Email sender", enter a "Company email label" such as a shorter trading name, employer brand or careers team name, or leave it blank to use your company name. For marketplace emails, go to "Manage Marketplace", then "Customisation", then "Branding", then "Email" and enter a "Marketplace email label", or leave it blank to use the marketplace name exactly as it is. Press "Save" on each.
Each tab has a "How this will appear to your recipients" table, so you can check the sender name every group of recipients will see before you save. Most boards don't need a label, because members receiving opportunity matches see your marketplace name on its own. Add one when that name is long, very short or could be confused with something else.
You start with a marketplace plan and add optional modules - the automatic Job Stream (per category) and the AI-powered importer. Every plan includes a fully functional job board with web and mobile access, unlimited employers, unlimited admin seats, smart talent matching, bulk invite of your talent pool, talent engagement insights, talent match emails, ATS link integration, free setup and onboarding, live chat support and a money-back guarantee. For current prices, see the pricing page.
No. Admin seats are unlimited and free on every plan - add as many colleagues as you need so the (already light) work can be shared.
Your data is yours - press "Export" on the relevant list and it downloads as a spreadsheet (CSV) file:
Open the menu, then "Manage Company", then "Company", then "Staff", then "Invite Admins" - paste up to 30 email addresses and press "Send admin invites". Admins can manage your company, post opportunities, review applications and join or start boards.
Running several boards? The sidebar's "Manage marketplaces" group links straight into each board's control room. "Manage Company", then "Marketplaces" lists them all. You can post one role to several boards at once by turning on "Display" for each board in the "Post opportunity to..." table.
Our team helps you move your data across - whether it lives in another platform or a spreadsheet. Free setup and onboarding is included on every plan. You can bulk invite your whole talent pool yourself right away with "Paste a list".
Can't find what you need? Contact us - we're happy to help.